A warranty document can be printed along side an invoice for a Customer Item.
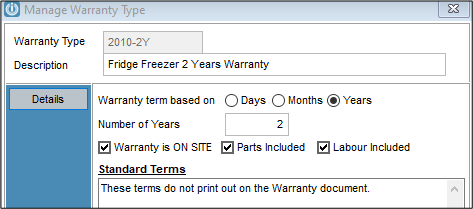
The Warranty Type
Under Admin / Settings / Manage Warranty Types
Select New to create a Warranty Type. Enter a description and term, and check to boxes to show what is covered by the Warranty.
Note: The Warranty Terms do not print on the Warranty Document.
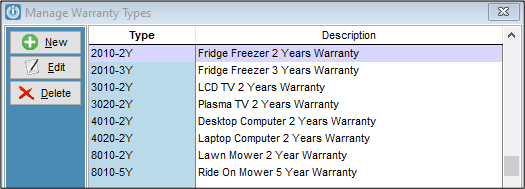
More than one Warranty Type can be created and viewed from the list.
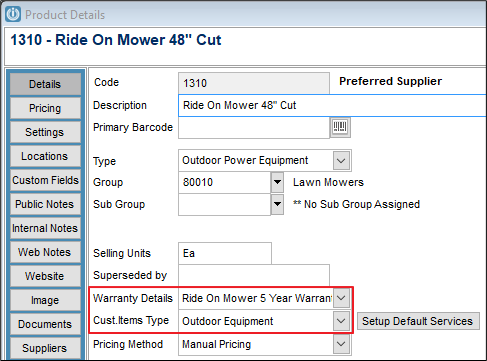
Preparing the Product
For a product to produce a Warranty, it has to be set up to include the Warranty Details, (selecting correctly from the Dropdown list) and Customer Item Type, this flows to the Customer Items Screen and Services can be set up for these..
Selling the Product
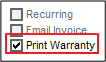
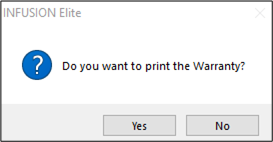
When a Product code with the Warranty setup correctly on the Invoice or POS screen, the Print Warranty box will show with a tick in it.
When the Product is sold a prompt will appear asking to print the Warranty
The Printed Warranty shows the Customer Details, the model that the Warranty covers, date, serial number and the Warranty Description.
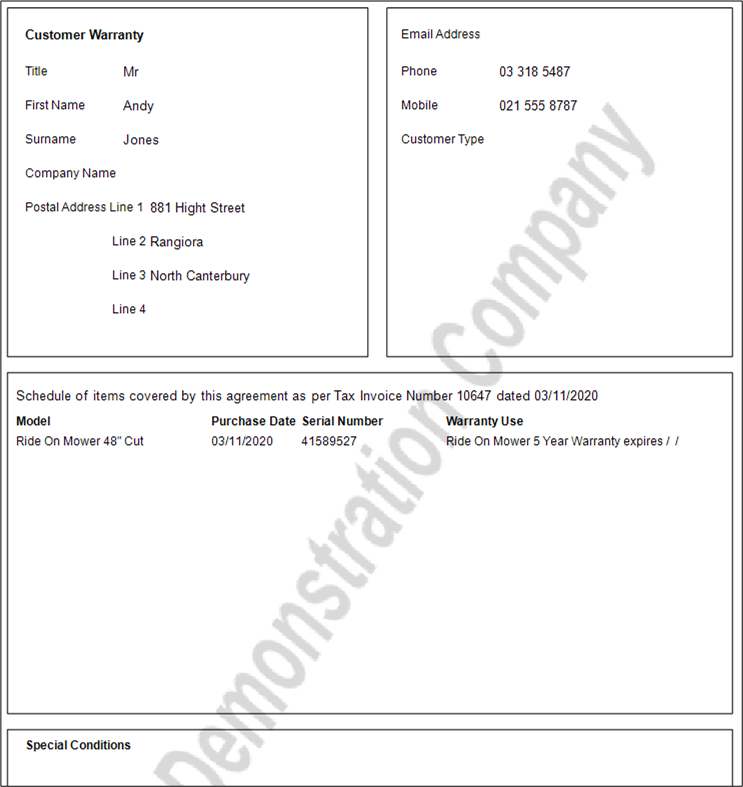
The Special Conditions are pulled from the Notes in the Invoice.
Reprinting the Warranty
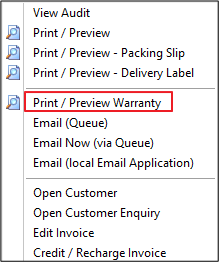
To reprint the Warranty, right click on the posted Invoice to see Print / Preview.
If the Warranty does not show, check the set up of the product to ensure this is correct. It may also be necessary to Edit the Invoice. Tick the Print Warranty box.

Also see Customer Items or OPE screen not showing when processing a sale
Comments
0 comments
Please sign in to leave a comment.