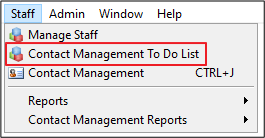
The Contact Management module displays in the Customer, Supplier and Staff dropdown menu
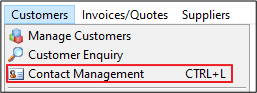
and on a right click of a Customer, Supplier or the Staff Member.

Before creating new Contact entries default settings need to be setup. Please see this article on Adding Contact Management Groups
Contact Management Screen
Details Tab
Displays all Customer details as per the Details screen of Customer Enquiry. These are all read only. Emails and SMS can be sent from this screen.
Contacts Tab
Displays all Customer Contact details as per the Contacts screen of Customer Enquiry. These are all read only.
Emails and SMS can be sent from this screen to the Contact person.
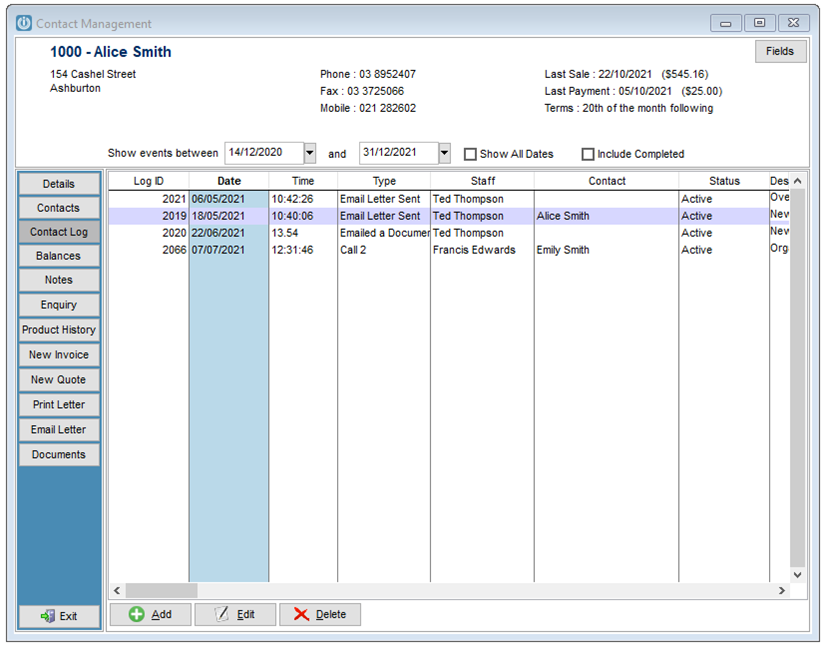
Contact Log
Lists all contact events made with the Customer. By default the module will open up on this screen. The range of events can be limited by using the date range fields at the top of the screen. To show all events select the Show All Dates tick box. Inactive items can be displayed as well by selecting the Include Inactive tick box option.
The Contact History can Show All Transactions or Show Filtered Transactions
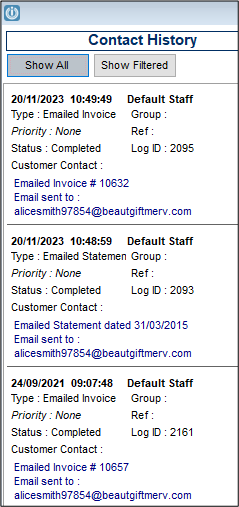
Show Filtered gives a Date Range and from the drop boxes all of the options are filterable.

To add a new contact event select the Add button from the bottom of the Contact Management screen. This will display the following screen:
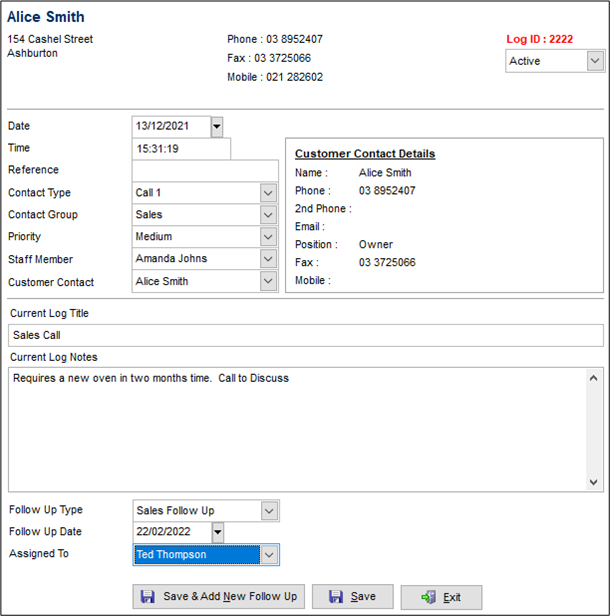
By default the Date and Time will be when the screen was opened. Change this if required. Using the Reference field can allow events relating to the same issue to be grouped.
Select the Contact Type and Staff Member creating the event along with the Customer Contact it was addressed to. If the person being contacted isn’t in the list then by selecting the **Other** option a text box will display allowing entry of this person’s name.
Select the Follow Up Type, Follow Up Date and Assigned To options to set up when the Customer is due to be contacted again.
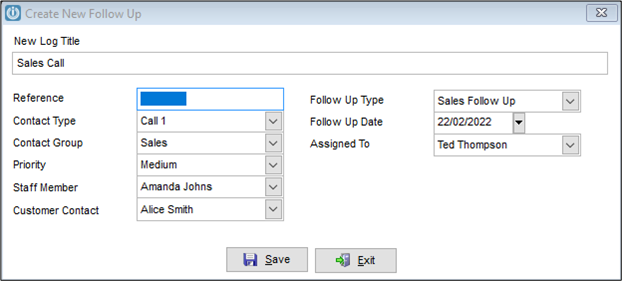
Add any notes relating to the event to the Notes field.
Any Letters and SMS messages sent to the Customer will be logged. For printed letters a pop up will appear when printing asking “Do you want to record these letters in the Customer Contact log?”.
The event can be made inactive by selecting the from the Status dropdown box. By defaults Inactive events won’t display in the log list.
The Edit and Delete buttons allow current events to be edited/updated and deleted respectively.
Balances Tab
Shows the Customer’s current and outstanding balances.
Notes Tab
Allows viewing and editing of Notes stored against the Customer. Standard Description text can be inserted in to the Notes section.
Enquiry Tab
Opens up the Enquiry screen for the selected Customer.
Product History Tab
Shows a list of Products the Customer has purchased and the last date this occurred.
Enter Invoice
Opens up the screen to create an Invoice for the selected Customer
Prepare Quote
Opens up the screen to create an Quote for the selected Customer
Print Letter
Allows a Letter created from the Letters module to be printed for the Customer
Email Letter
Allows a Letter created from the Letters module to be emailed to the Customer. The email list works off the main email address or the first Contact of the Customer. If the first Contact for a Customer has no email address set up then the main email address will be used, if the first Contact has an email address this will be used instead of the main email address.
Launch Contact Management Follow Up - To Do List when Logging on
Under the Login tab of a Staff Account is the option to Launch Contact Management Follow Up - To Do List when Logging on which when selected will present a user with the following screen when they log in to Infusion.
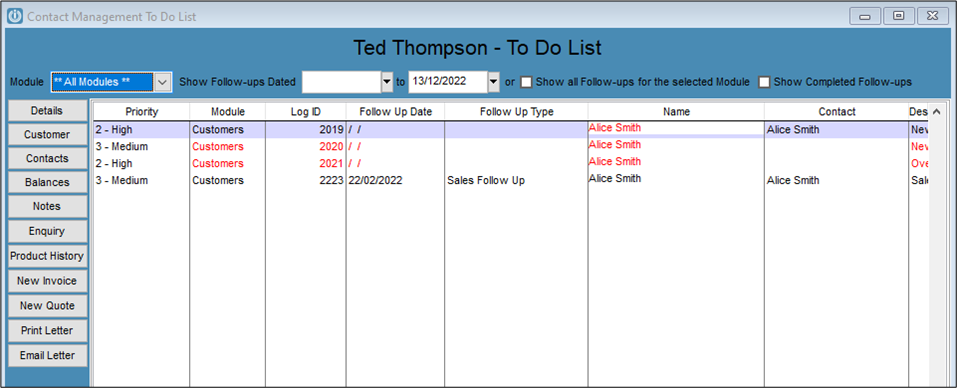
This screen allows the user to manage follows calls / events, have access to Customer information, prepare Invoices and Quotes, all from the one place.
If this screen is closed it can be opened for the logged in user by selecting the Contact Management To Do List option from the Staff dropdown menu.
Comments
0 comments
Please sign in to leave a comment.