
Honeywell Intermec PF8d
Printer Settings
Start Menu > Devices & Printers
Right click on the label printer, set as default printer (green arrow now on icon).
Right Click on the Intermec Printer and select Printer Preferences, enter in the label from the stock drop down, if your label is not there add a New stock label. Make sure the label is set to Portrait
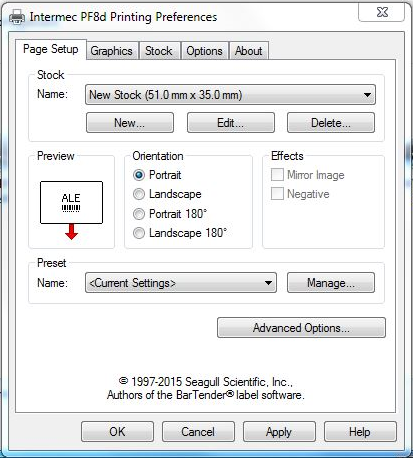
Click Apply then OK
Infusion Settings
Copy the Barcode Label Layout and paste into the custom folder eg BARCODES.LBX and BARCODES.LBT
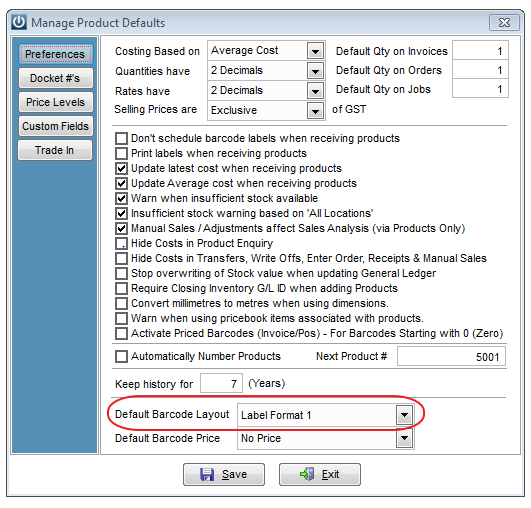
Go to Admin > Defaults > Manage Product Defaults
Set the Default Barcode Layout to Label Format 1 or whatever label matches the one in your custom folder.
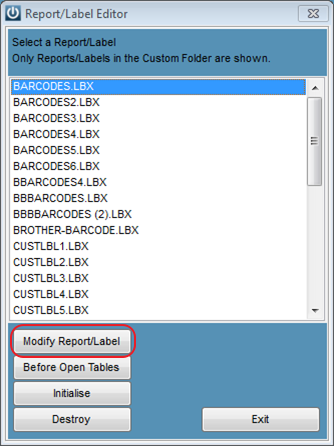
Go to Help > Report/Label Editor
Click on the default barcode then select Modify Report/Label tab
Go to File > Page Setup
Check printer is the default printer eg. Intermec PF8d
Check Width matches Product Label Settings (or near to)
Check Print area is set to Whole Page
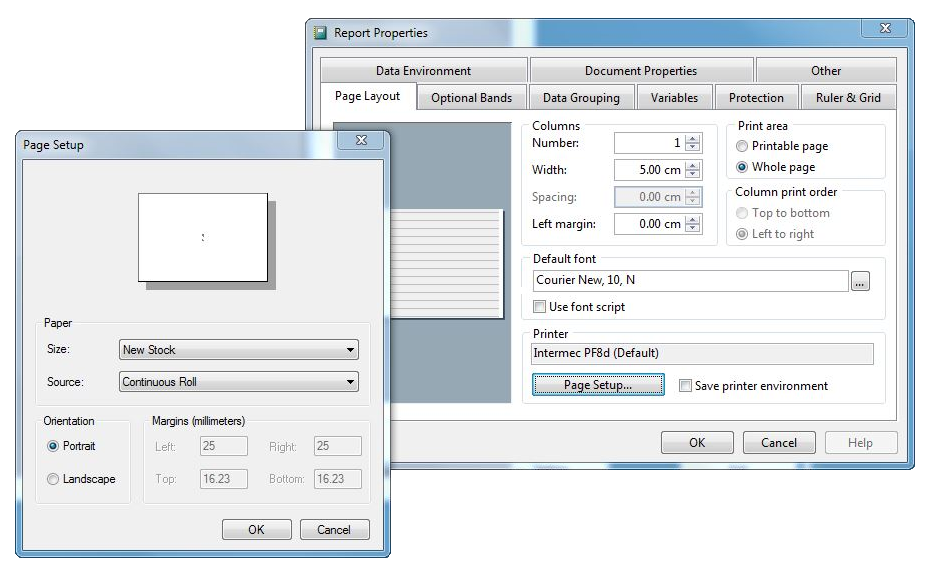
Click on the Page Setup Tab check Size/Name of label is the same and orientation set to Portrait.
Click OK

Tick the Save Printer Environment then Select OK.
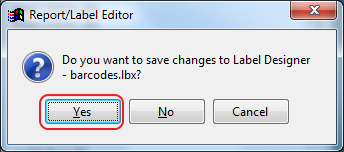
Select Yes
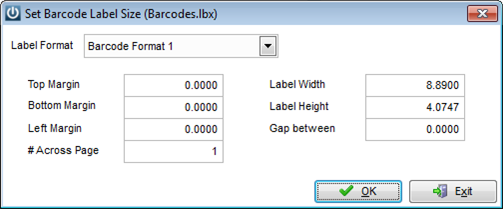
Last check go to Admin > Settings > Products > Manage Product Labels
Select the default barcode format check the sizes match the label settings.
Go to the Start Menu > Devices & Printers
Change your default printer back to your main printer.
Note: If your labels do not print correctly on your label ie; too high or to the bottom or left of label but are perfect when you preview, you will have to Calibrate your printer.
Reason why you may need to do this?
You may print more than one size label from your label printer and it remembers those settings.
To calibrate see your instruction manual or follow these instructions:
CALIBRATE PRINTER TO ITS MEDIA
To calibrate the printer to its media...
- With the printer turned off, load the printable stock and ribbon (if ribbon is to be used)
- Press and hold down the 'Feed / Pause' button
- While still holding down the 'Feed / Pause' button, turn on the printer.
The Status LED will blink 'green' for 2 seconds, 'red' for 2 seconds, and then will blink 'green' again. - Select the Media Type...
- For Gap or Black Mark Stock, release the 'Feed / Pause' button when the Status LED is flickering 'green'
- For Continuous Stock, release the 'Feed / Pause' button when the Status LED is flickering 'red'
The printer will now feed labels and calibrate the label length.
- Once the calibration is complete, the printer will output a full Test Label set: the Configuration Settings labels, and the Pitch test label.
After the Test Label sets finish printing, the printer will print out a line saying that it is in Data Dump Mode. - Power cycle the printer:
- Turn the printer off
- Wait 30 seconds
- Turn the printer back on
- Let the printer start up normally
The printer is now physically ready to work.
Comments
0 comments
Please sign in to leave a comment.